Enabling Macros in Excel: Our Recommended Configuration
 By David Hartley — Fri Dec 05 2025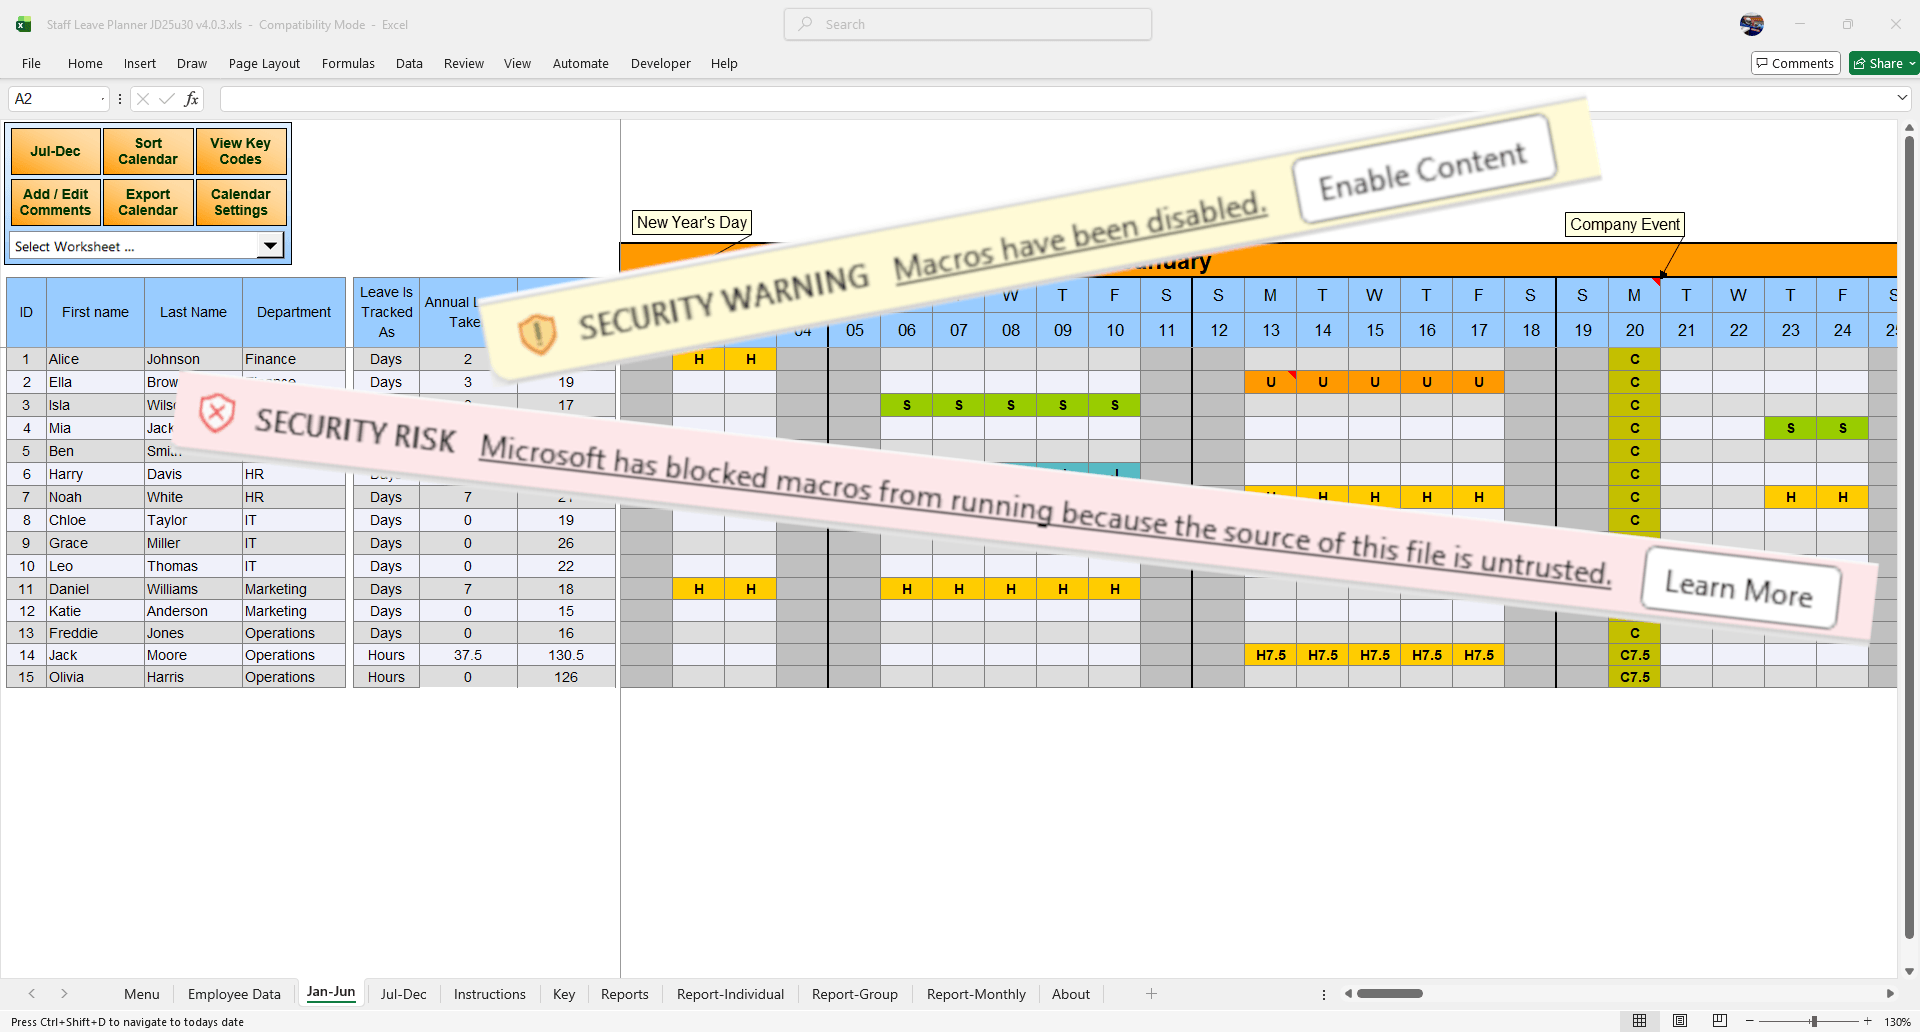
If you use the dhxsoft staff leave planner, you will already know that Excel macros are essential for making the planner quick and easy to use. Macros are the planner's super power. They drive the calculations, they secure your login, they allow us to handle configurations that that are too complex for formulas, they run the reporting, they add helpful right click menu options, and they make the overall experience feel seamless.
At the same time, Excel is rightly cautious about running code. Its security settings are designed to stop unknown or unsafe files from running on your computer. The downside is that macro security can feel fiddly. You open a file, get a warning, click something that seems right, then find it hasn't worked, there's another setting somewhere you need to go and change.
This guide walks through the setup we recommend for most users. It keeps your computer safe while making it simple to open your dhxsoft planner without endless popups.
Step 1: Use "Disable all macros with notification"
The first and most important setting to check is how Excel handles macros in general.
Excel gives you several levels of macro security. At one end you can block everything. At the other you can allow all macros to run without any checks, which is very risky. Our recommended middle ground is:
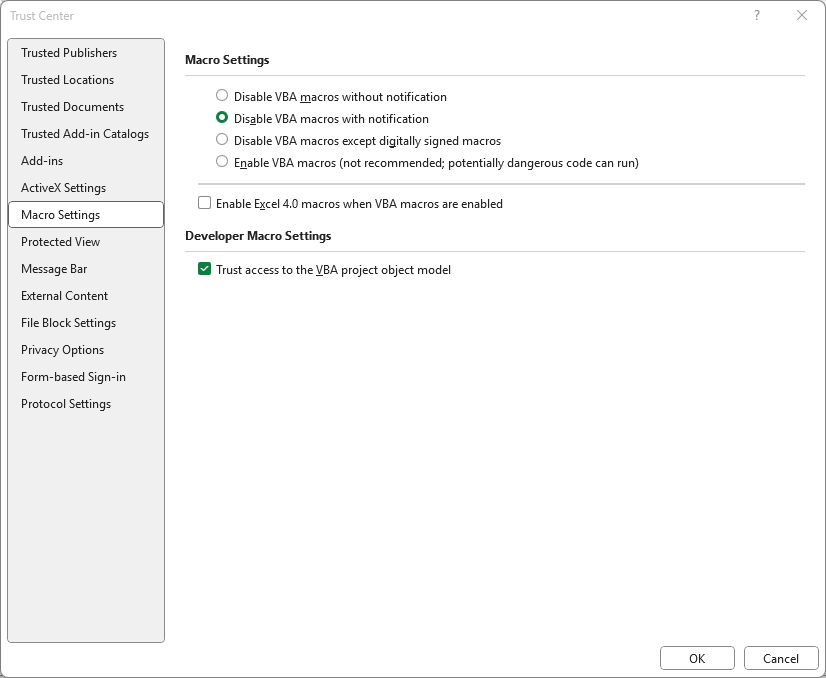
Disable all macros with notification
This option keeps you safe by blocking macros automatically in any new file. At the same time, it shows you a clear notification bar so you can choose to enable macros when you know the file is trusted, such as your dhxsoft staff leave planner.
Why this matters for security
- It stops unknown macro files running silently in the background
- You always get a clear warning before macros are enabled
- You stay in control. Only the files you trust get full access
How to set "Disable all macros with notification"
- Open Excel
- Go to File in the top left corner
- Click Options at the bottom of the menu
- In the Excel Options window, select Trust Center from the left menu
- Click the Trust Center Settings button
- In the new window, choose Macro Settings from the left side
- Select Disable all macros with notification
- Click OK, then click OK again to close the Excel Options window
From now on, when you open a macro enabled workbook, Excel will show a security warning at the top of the window with a button to enable content. This is your first layer of protection.
Step 2: Use Trusted Locations for a smoother experience
While the macro warning is good for security, it can be annoying when you open the same trusted file every day. That is where Trusted Locations are very helpful.
A Trusted Location is a folder that you have told Excel to treat as safe. Any macro enabled workbooks stored in that folder will open without security prompts. Excel assumes that if you trust the folder, you trust the files inside it.
For a dhxsoft staff leave planner, this works perfectly. If you store the planner in a specific folder that you control, you can mark that folder as a Trusted Location. After that, when you open the planner from that folder:
- You do not get constant macro warning popups
- The planner opens ready to use, with all buttons and features enabled
- You still have strong security for files stored in other locations
The key point is that Trusted Locations should only be used for folders you control and understand, such as your own documents folder, a specific network folder used by your team, or a dedicated folder for your planners.
How to add a Trusted Location in Excel
Follow these steps to set up a Trusted Location for your dhxsoft staff leave planner.
Decide where to store your planner
Choose a folder on your computer, network drive, or OneDrive sync folder where the planner will always live. Move your dhxsoft planner file into that folder if it is not already there.
Open the Trust Center settings
- Open Excel
- Go to File
- Click Options
- Select Trust Center from the left menu
- Click the Trust Center Settings button
Open the Trusted Locations section
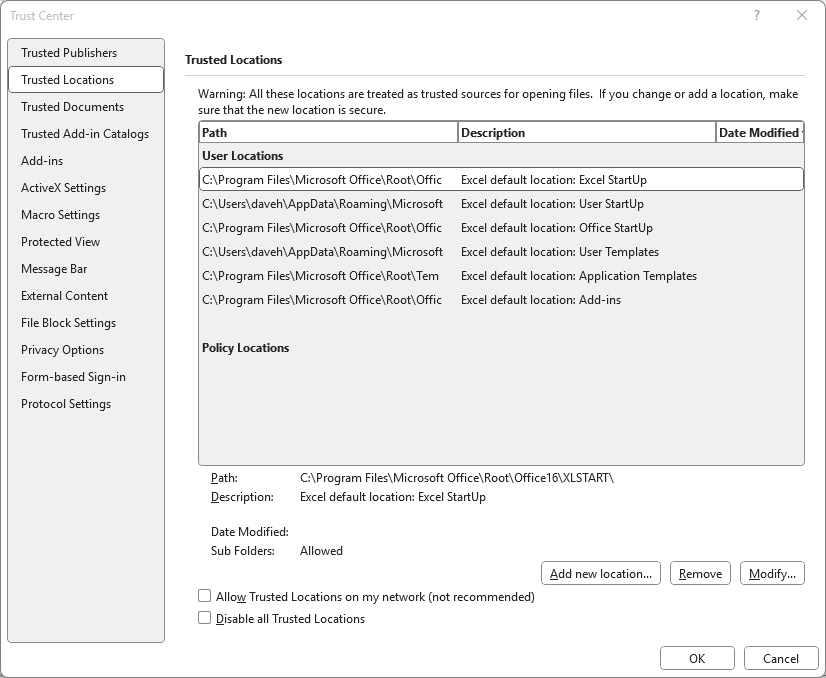
In the Trust Center window, select Trusted Locations from the list on the left. You will see a list of folders that Excel already treats as trusted.
Add your new Trusted Location
- Click Add new location
- In the dialog box that appears, click Browse
- Navigate to the folder where your dhxsoft planner is stored
- Select the folder, then click OK
Choose whether to trust subfolders
If you want Excel to trust every folder inside this location, tick Subfolders of this location are also trusted. This is useful if you keep several planners or related files in a neat folder structure.
Give it a description (optional but helpful)
In the Description box, you can type something like "dhxsoft staff leave planner folder". This makes it easier to remember why you added the folder later.
Confirm and close
- Click OK to add the Trusted Location
- Click OK again to close the Trust Center window
- Click OK in Excel Options to return to Excel
What happens next when you open your planner
Once you have both settings in place:
- Macro setting: Disable all macros with notification
- Trusted Location: Folder containing your dhxsoft planner
You get the best of both worlds.
For files outside your Trusted Locations
- Excel will block macros by default
- You will see a warning bar and can choose whether to enable macros
For your dhxsoft staff leave planner
- As long as it is opened from your Trusted Location, Excel will not show a macro warning
- The planner opens straight away with all features ready to go
This approach keeps your organisation safer, reduces the chance of accidentally running a malicious file, and avoids the daily frustration of clicking the same security prompts again and again.
Sharing with colleagues
If you share the planner with colleagues, you can give them the same simple instructions: store the planner in the agreed folder, add that folder as a Trusted Location, and keep macro security at "Disable all macros with notification". After a one time setup, the planner should open smoothly every time.
Need help setting up your Excel staff leave planner? Contact our support team for personalised assistance.